Safari Photography
After leading wildlife and photography trips for nearly 20 years, I have accumulated various thoughts, notions and ideas on all aspects of photography whilst travelling. The information and advice here is a product of these diverse travels, from the Tropics to the Poles.
The aspects covered can be moulded or adapted to suit most situations – sound advice still holds true whether you are in a tropical rainforest or on Antarctic ice. However, what I am referring too here, I will call ‘safari photography’ which in its broadest sense , covers more open habitats and where much of the photography is primarily vehicle based. This is therefore applicable to most 'classic' African safaris and also trips to India (tiger watching etc) and to a certain extent destinations like the Pantanal, where much of the photography is from a vehicle or a boat (although there is also quite a bit on foot too).
This information is certainly not ‘all you need to know’, but hopefully it will be a useful guide and starting point.
Do you want to find out more about Nick's safaris and photography trips?
Before You Leave
Be Prepared

Safaris in East Africa always present fantastic opportunities but this is not the time to begin reaching for the camera manual
How many times have clients turned up at the beginning of a trip with a new camera they have not used before - more times than I care to remember. The secret is to be prepared and this means being familiar with your camera and other kit beforehand. If the only time you take photos is on an annual holiday, remembering the basics will be challenging, let alone actually progressing and improving.
If I have a couple of months at home sitting behind my computer and then go away on a trip, it certainly takes me two or three days to get back into the swing and feel comfortable with a camera in hand, so I do what I need to do ‘automatically’. Practice really does make perfect: so at the very least make time to practice in your garden or local park a few times before a trip. Time spent familiarising yourself with a new camera or reconnecting with your existing kit will pay dividends when your safari begins.
And you do not have to set out to take amazing photos when practicing (although there is no harm in trying); simply familiarising yourself with the controls and basics will be enough. Go through the motions and remind yourself about exposure, altering apertures and shutter speeds, the effect of changing ISO and checking histograms etc.
Equipment

Small lenses like 24-85mm or 24-120mm are perfect 'general all-rounders'
Wildlife photography often involves long periods of waiting and inactivity, punctuated by relatively brief stints of action. In such circumstances keeping things simple and cutting down choices is often best. It is silly carrying an array of lenses covering a wide range of focal lengths, when most will be largely useless. The more options you have, the more time it takes to make decisions and while you are dithering the moment will have passed!

A 70-300mm lens offers flexibility
Safaris can be dusty so a second camera body as a back up is always a good idea (but of course not essential). Dust covers to protect cameras with lenses attached are also invaluable. An old pillowcase does the job well.
For lenses, the minimum recommended focal length is 200-300mm but longer focal lengths - super telephotos of 400-600mm are obviously better in many instances. To keep equipment manageable it is often far easier to take a zoom lens that cover ranges of focal lengths.

Lenses like this 80-400mm offer lots of flexibility and high quality, but at a price
One solution being two zoom lenses, one for close subjects and landscapes and one for more distant subjects, wildlife and some landscapes: a combination of zooms around 17-85mm and 70-300mm or 80-400mm / 100-400mm would maximise your photographic opportunities. If you are serious about your photography, then a prime lens of 300mm or longer will give the best quality results, but of course these lenses can be prohibitively expensive.

A 200-400mm is perhaps the ultimate safari zoom lens
A word of caution about zoom lenses. If you are thinking of buying a new lens, there is a temptation to go down the ‘one size fits all’ route. Think again. So called super-zooms that cover a very wide range of focal lengths might appear to be an ideal solution, but they are not. When using zooms, more often than not, you use the lens either at its minimum or maximum focal length (the number of shots taken somewhere in the middle is relatively few), yet the extremes of focal length are where zooms perform least well and this phenomenon becomes more extreme as the range of the zoom broadens.
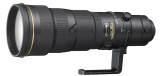
500mm f/4 lenses are fantastic but cost as much as a two-week safari
So ‘super zooms’ like 28-300mm, 35-350mm and 150-500mm can perform rather poorly at the focal lengths you are most likely to use them (by this I mean images can appear slightly ‘soft’ and contrast can be reduced). In addition, on a safari you will general find that you will use a zoom of this type at its maximum focal length the majority of the time, so immediately most of your images will be compromised.
The Support Team

Beanbags remain the most versatile camera support in a safari vehicle
After the camera body and lens, how you support your equipment is the most important accessory. In fact this aspect is equally as important. If you aspire to crisp, sharp images, good support is crucial.

Fully open safari vehicles often have few places to rest a beanbag. Here a monopod or tripod can be useful
In most photographic situations I would always recommend a tripod, however, on safari where most photography is done from a vehicle this is impractical. I still believe the best solution from a vehicle is a trusty beanbag; the secret is that this must be reasonably large and double lobed so it can sit over or straddle the window frame or seat back or whatever you are resting the bean bag on. The bag should also have a zip so it can be transported empty and filled with rice or beans when you arrive. There are many such beanbags available commercially .
A number of manufacturers now offer purpose-built window clamps, platforms and similar devices that are designed specifically for supporting cameras and large telephoto lenses when working from a vehicle. Most allow a conventional ball-and-socket head to be fitted between the support and camera/lens combination. These can work very well, but do have their limitations, as they can be a bit restrictive when wanting to move quickly and alter position to follow a subject on the move. Again I find a beanbag more flexible and far less expensive.

Tripods can be used with great effect in small boats
Tripods are generally not practical within the confines of a vehicle, especially when sharing with others. An exception is in the open-style safari vehicles that have no windowsill or roof on which to place beanbags. This type of vehicle is rare in East Africa (except on some private reserves), but tends to be far more common in safari camps in southern African countries like Zambia, Botswana and South Africa. In these vehicles a tripod or monopod can be very useful in addition to a beanbag.

Even big telephotos like this 600mm can be used successfully with a tripod from a boat. Here in the Pantanal waiting for a jaguar
When photographing from a small boat, for instance in the Pantanal or some locations in Borneo, a tripod can be invaluable (even crucial), especially if you are using a long telephoto lens. Whist this can be a little awkward because of the tight space, the rewards far outweigh the disadvantages. I ALWAYS use a tripod with my long telephoto lenses when in a boat, and have been rewarded with some lovely (sharp) shots of jaguars in the Pantanal and proboscis monkeys in Borneo to name but two examples.
Once You Get There
The Default Approach

Things often happen suddenly and quickly. Be ready! A Martial Eagle snatches a Guineafowl
A lot of safari photography involves what I call “shooting from the hip”, not literally of course, but rather it is quick reaction picture taking: you happen upon something good – an animal posing in a pool of enticing light or some rapid-fire behavior action – and you have to get shots quickly while working in ‘auto-pilot’. For this reason it always pays to keep your camera to hand with the lens cap off. If your gear is tucked away in a bag with the lens cap on, you will lose critical seconds and by the time you are ready, the moment will have passed. If you're worried about dust then slip the camera with lens attached into a dust bag or pillowcase.
When good photo opportunities are most likely – the first two hours after sun up and the last hour and a half of light prior to dusk - my default approach is to have the camera switched on and ready to go - it is never packed away. The camera is set in aperture priority mode (A or AV), with the lens set to a wide aperture (f4 or f5.6) to allow maximum light in, thus corresponding to the fastest shutter speed the ambient light allows. I use continuous focus mode (Nikon) (Ai-servo in Canon) with the focus point set in the center (where it works at its optimum). At the beginning of the morning drive, when light levels are still low, I will set the ISO high to compensate – between ISO 1000 and ISO 3000** – then as light levels improve this will gradually be reduced to ISO 800 and then ISO 400.
** My pro-spec cameras produce very good results at high ISO values, but some camera bodies struggle to maintain good picture quality at higher ISO values. As technology has improved the high ISO capabilities of most camera bodies (even relatively inexpensive models) has also improved, but you will need to be familiar with your own equipment to know where acceptable parameters lie.
With this approach I am able to react quickly if a good opportunity suddenly presents itself and I can grab shots quickly. If the opportunity persists and develops and subject hangs around, then I can spend longer considering alternative options and experiment with compositions and further refinement of settings etc.
Dealing with Changing Light

Silhouettes are a 'classic' composition at first light. A Black-bellied Bustard calling in the Serengeti
Between first light and the sun beginning to peak over the horizon, the light will be gloomy and flat, which will limit opportunities, but not completely prevent you taking pictures (see low light). However, as soon as rays of direct sun appear the golden period of the day begins. When the sun is low, light is rich and warm and bathes landscapes and subjects in ideal light for taking dramatic photos. Sadly, such perfect conditions do not persist for long – normally 1½ to 2 hours after sun up at best. By 08.30am the light is on the cusp and is already too harsh.
During the ‘golden period’ photographic opportunities are at their best. This is when you should concentrate your efforts. With the sun behind you, subjects will radiate in the ideal light, colours will be saturated and shadows will be long, adding depth and a more three-dimensional feel to images. Under such conditions attaining well-exposed images is relatively easy, as the sophisticated internal light meter of your camera will rarely be fooled.

Back lighting can be very dramatic, but requires careful exposure. Here a Verreaux's Sifaka in Madagascar
While the sun remains low in the sky there are also possibilities of taking dramatic shots ‘into’ the light, i.e. shooting towards the sun. Here light beams through woodland or morning mists can be very evocative or subjects with hair can offer fabulous ‘rim light’, ‘back light’ or ‘halo’ effects. These situations require careful exposure and more consideration: sometimes, deliberate under-exposure produces the desired result, but equally intentional over-exposure is sometime necessary to get the job done.
Certainly by 09.00am the light has become too harsh and I would only take photos if something really unusual or dramatic happened. From this point onwards the light steadily deteriorates, becoming ever more harsh and increasingly blue and flat until the middle of the day when the situation is at its worst. This is one of the reasons the middle of the day (generally 11.00am until 3.00pm) is spent resting back at the lodge. Good light quality begins to return around 4.30pm in the afternoon, when the sun returns to a low position in the sky, and it is again at its best from around 5.30pm until sunset.

In glowing early morning light this Yacare Caiman in the Pantanal could hardly look better
During the ‘dead’ period when light is harsh and horrid, there are some ‘get out of jail’ cards that can be dealt or you can choose to play. The ideal solution is that natural forces conspire to reduce the light’s harshness between 8.30am and around 4.00pm. This is easier to achieve than you might think, all that is needed are clouds, ideally the high thin wispy variety across the whole sky. These act as a gigantic diffuser and soften the light dramatically. No longer is it unidirectional and from above, but instead it effectively emanates evenly from horizon to horizon. The result is the cold blue hues are filtered out and all the hard-edged shadows are removed. These ‘soft’ light conditions reduce contrast dramatically (there are no bright highlights and deep shadows) and are ideal for recording detail and accurate subtle colour in photos.

Cloudy conditions show the colours and subtle feather detail of this Woodland Kingfisher to best effect, even when taken in the middle of the day
The perfect photographic day is sunny conditions between dawn and 8.30am, soft cloudy conditions there after until around 4.00pm, when the cloud clears and sun comes out again until dusk. Of course things rarely work out like this.
I am in the fortunate position to being able to be choosy. I return to safari locations reasonably often, so have the luxury of being highly selective. I often say to myself, “conditions are not ideal, so don’t bother.” No matter how tempting, the resulting photos will end up being deleted anyway. I take pictures to sell, so I’m only interested in stuff that has a chance of being top drawer. If I were not super-selective I would be swamped by tens of thousands of (useless) images after each trip. But most people on a safari are likely to be visiting for the one-and-only time and they are also likely to be taking their pictures with very different priorities and criteria. So inevitably there are bound to be situations when you want to take photos, but the light conditions are poor. There are some options to help the situation.
1. Polarising Filters

Polarising filters reduce reflections and glare and boost saturation, especially in blue sky, but use them carefully. A germinating seedling on a beach in Madagascar
These filters act to reduce contrast by minimising reflections and ‘glare’, while increasing colour saturation. They can be very good for deepening blue skies and dramatically increasing definition between sky and clouds.
Good polarising filters are not cheap, but they are worth paying extra for. For use on autofocus lenses, make sure you buy the ‘circular’ variety (not the ‘plane’ or linear type). If you plan on using one on a super-wideangle lens (less than 20mm) there are a couple of notes of caution. Firstly, beware of vignetting (the issue where the four corners of the image are darkened) as the rotating barrel collar of some filters is quite ‘deep’. This can sometimes become ‘visible’ at the corners and edges of images at extreme wide angles. And secondly, when using on broad expanses of sky, the ‘polarising’ effect may not be even across the entire width of the image.
Away from harsh lighting conditions, polarising filters are also very good for reducing reflections on water and deliberately slowing shutter speeds (generally by around 2 stops) to achieve effects like ‘creamy’ flowing water or for panning and motion-blur pictures in broad daylight (see later).
2. Fill-in Flash

A trace of fill-in flash was used to add light and ‘pep’ up the front of this Red-headed Weaver
Here the addition of light from a flashgun to existing natural light can ‘fill-in’ some of the deep shadows and reduce the overall contrast. This is sometimes referred to as ‘balanced’ flash as you are effectively balancing natural light with an amount of artificial light. It can be particularly effective to reduce shadows beneath an animals’ eye and add the all important catch light.
The issue of course is that this is only possible when the subject is close enough for light from the flash to reach. This working distance is governed by the power of your flash. Pop up flashes on top of cameras are only useful when the subject is relatively close, say less than 3m away, where as larger ‘bolt-on’ flashguns can throw light effectively on to subjects up to 10m-15m away.

Taken near dusk, fill-in flash helped me balance the exposure of these Scarlet Ibis, while the addition of light 'lifted' them away from the gloomy sky behind
Whilst it is always dangerous to over-generalise, a simple no-nonsense approach to 'fill-in flash' is to set your external flashgun to auto TTL (the terms / abbreviations used varies between Nikon and Canon), then reduce the flash output by 1.5-2stops (flash output control marked [⚡+/-]).
Further refinements can be made if a subject is even further away and your flash is already working near its limits. Add-on flash extenders (e.g. Better-Beamer flash X-tender) can work well. These attachments place a Fresnel lens in front of the flash, with the effect that the light from the flashgun is concentrated into a narrower beam and allows it to be projected over a much longer distance. They are often used in conjunction with telephoto lenses. However, their effect can be difficult to gauge, especially at longer working distances and judging success simply by looking at the image on the small screen on back of your DSLR's is fraught with pit-falls. So, if there is time, shoot a range of exposures with differing flash-outputs and pick the best after looking at the images on your computer.
Taking Pictures in Low Light
There are obvious issues to photography in low light: photographs are created by light, so if there is not much of it around the ability to take images is bound to be compromised.
As light levels reduce the first thing to do is open the aperture as wide as possible to let the maximum amount of light into the camera. This means selecting smaller f-numbers. Most lenses will go down to somewhere between f/5.6 and f/4, while more expensive lenses offer apertures between f/4 and f/2.8 and occasionally lower (depending on the focal length). With the lens aperture is wide open as possible, you will be achieving the fastest shutter speed (briefest period of time) the conditions allow.
Back in the Stone Age when we used film, as light deteriorated so-called ‘faster’ films became necessary, films with high ASA ratings like ASA800 and even ASA1600. ISO is the digital equivalent of film speed, the major difference being this can be changed whenever you wish, rather than only when the roll of film is finished.

The best digital cameras are almost capable of 'seeing' in the dark
Increasing the ISO value, therefore, makes the cameras digital sensor (the bit recording the picture) more sensitive to light, which effectively means less light is needed to create an image. So as light levels fall, the ISO on you camera can be increased, with the result that shutter speeds can be maintained at faster values for longer. Of course there is a trade-off – as ISO values increase then the final image quality begins to suffer. Just as fast films were notorious for being ‘grainy’, so higher ISO values lead to increased ‘noise’ in an image (the digital equivalent of ‘grain’).
That said, the technology of modern sensors is such that even at high ISO values, most cameras can achieve amazing results with noise levels that are hardly noticeable. They can practically ‘see in the dark’. Further if images are taken at very high ISO values and do suffer from obvious noise this can be further reduced when processing in Lightroom (or similar), providing the original image was taken as a RAW file.
As well as opening the aperture to its maximum as light levels fall, you also have the option to keep increasing the ISO value and this will also maintain reasonable shutter speeds to freeze an animal’s movement. How far you can increase the ISO will depend on the model of camera you own, but most current models produce acceptable results at ISO 2000-3000 and some well beyond this (obviously such things were unheard of back in the days of film).
As always it is good practice to use appropriate camera support – a bean bag on safari – and this is especially so in low light when shutter speeds begin to slow. In addition consider you subject and pick you moments to press the shutter carefully. If the lion is turning its head from side to side, just wait for the instant it pauses – all you need is 1/60th of a second. If the subject is moving quite quickly, and especially if it is walking straight towards you, then getting a pin-sharp image might just be impossible. That shot may have to wait for another time.
As light levels continue to fall, you can pack your cameras away and draw a line under the day’s photographic proceedings or you can make the most of time in the wild and experiment with one or two things you may not have considered before. Not only does the high ISO capabilities of modern DSLR’s allow you to continue shooting way longer into the day (using only natural light), but also there is no issue if the results of your experimentation are all rubbish. You can just delete them and try different alternatives another day.
Motion Blur

When all the elements come together motion blur images are beautiful. This male Tiger is in Bandhavgarh NP.
One technique that digital technology has revolutionised is that of ‘motion blur’ or ‘panning motion’. While it been around for a while now (even in the days of film), it still has the capacity to generate a ‘wow’ factor in an image, providing it is done well.
The concept is simple – use the motion of a moving subject in conjunction with a slow shutter speed to create deliberate blurring in the back ground and moving elements of a picture, so that they stand out from the parts of the image that are not blurred.
Early morning and late-in-the-day light conditions are ideal, when light is not only low, but also ‘flat’ with very little contrast. A pleasing, successful motion blur image requires a subject where the major areas are relatively sharp, primarily the head/face and to a lesser extent the body, and all other areas are blurred.
The best situations tend to be when the animal (either walking or running) is moving roughly parallel to your camera position (i.e. it is moving neither towards or away from you) and the secret is to pan the camera smoothly, beginning this motion before you press the shutter and continuing it once you have stopped firing.
Sustained subject tracking requires a steady hand if you are hand-holding the camera (one of the few times I advocate this), a beanbag, or panning tripod head. In theory this technique can be tried with any lens, but the physical practicalities of trying to weald a giant 600mm lens probably preclude this and it is unlikely you will get pleasing results with a wide-angle lens, as the subjects will appear too distant to be meaningful. I think the best results are achieved with a medium telephoto – a particular favourite is my trusty 70-200mm f/2.8. Achieving this requires practice, but do not be scared to have a go, you have nothing to loose.

For added 'arty-farty' effect, try motion blur images in B&W. I use a camera with an infra-red sensor that produces its best results in the middle of the day
Here’s a checklist of what to do.
- Set the mode to shutter priority (S for Nikon, TV for Canon). Or if you prefer to use aperture priority (as I do), simply select the aperture that produces which ever slow shutter speed value you require. ***
- Set your camera's focus mode to Continuous AF (Nikon) or AI Servo (Canon).
- Select Continuous High from the cameras shutter release options.
- If you are using a VR or IS lens switch to the appropriate mode for panning.
- Select a slow shutter-speed, generally somewhere between 1/30th and 1/15th second.***
- Use centre-point focus on the main body of the subject (as this works best in low light).
- Begin to focus on the moving subject before it reaches the position you anticipate being optimum for the images.
- Pan (rotate your position) and follow-focus in the same direction as the subject is moving trying as best you can to move or pan at the same speed the subject is moving (which means you are trying the maintain the subjects position in the frame as it moves).
- Press the shutter and hold it down after you have started the movement and shoot a rapid-fire sequence of images.
- Keep your fingers crossed.
*** There are no fixed rules as to what shutter speed works best. The extent of the blur effect achieved is dependent on the direction the subject is moving relative to the camera and also the speed the subject is moving. So a sprinting cheetah taken with a shutter speed of 1/125th second can appear just as blurred as a wildebeest walking taken at 1/15th second.
If you want to have a crack at this technique when the light levels are better, then remember the best results are achieved when there is limited contrast i.e. in cloudy ‘flat’ light conditions. To reduce the shutter speed sufficiently to get the desired blur you may need to reduce the ISO (perhaps to its minimum) and if this still is not sufficient you can cut down the light further my using a polarising filter (2 stops reduction) and / or a neutral density (ND) filter, which come in different strengths.
Exposure
Good exposures are crucial to good images, although one of the (many) benefits of digital technology is that you have the capability to alter and tweak this once the image has been taken, provided you shoot in RAW (there are dramatically limited options for tweaking with JPEGs). Nonetheless, an understanding of exposure is fundamental to good photography and is certainly necessary if you want to improve as a photographer, as virtually all the other core elements of photography stem from exposure.

To achieve the 'halo' effect around these back lit Ring-tailed Lemurs, I under-exposed by three stops to produce the 'correct' exposure
However, what constitutes ‘correct’ exposure is more subjective. Correct exposure can effectively correspond to whatever the photographer wants it to be. If you want your image to faithfully and realistically replicate the subject in the way you perceived it with your own eyes, then the settings that achieve this constitute the ‘correct’ exposure. If on the other hand you want to evoke something different and more creative in the final image, you might want to deliberately make the final image darker or lighter than reality, but if this results in the desired effect, then this can equally be regarded as a ‘correct’ exposure. Having said this, most people in most situations, would regard faithful representation of reality as equating to ‘correct’ exposure and for the purposes of the following explanations, this is what I will assume.

This Flap-necked Chameleon is a perfect mid-tone, as is the background. In diffuse light a camera will assess this exposure perfectly every time.
In good light and with the majority of subjects, the cameras built-in light meter will assess things correctly resulting in correctly exposed pictures. There are of course times when the camera can be fooled and it pays to know when these situations are likely to arise and what to do, when you need to deviate from the cameras suggested exposure settings.
Deviation from the cameras exposure setting is called ‘exposure compensation’ and it is extremely useful to understand the fundamentals. A cameras light meter works from a ‘reference point’, which corresponds to a mid-toned subject, sometimes also referred too as ‘neutral grey’. Most subjects in the natural world fall there or thereabouts, into the mid-tone range.
This means in choosing exposure settings (aperture / shutter speed combinations) a camera tries to ‘turn’ everything to a mid-tone. So if a subject is very bright or white, the camera tries to bring it back to mid-tone, by selecting settings that effectively slightly under-expose the subject and tend it towards neutral grey. Conversely, a camera tries to lighten very dark subjects by picking settings that allow too much light into the exposure. Using exposure compensation solves this issue.
In any of the cameras automatic or semi-automatic exposure mode options - aperture priority (A or Av), shutter priority (S or Tv) or program (P) – you can use the +/- command or compensation dial to alter the settings. White or bright objects will need + values to increase exposure (add light, but using longer shutter speeds), whereas dark subjects will need - values to decrease exposure with shorter shutter speed.
The Histogram
However, the best way to accurately gauge the exposure on an image is by looking at the histogram in the display on the back of the camera. This is one of the most crucial and useful tools on a digital camera.
A word of warning – DO NOT rely on looking at the image on the camera’s LCD display to judge exposure. How you perceive this, is heavily influenced by ambient light and the conditions at the time. If you are in a darkened room, the image on the back of the camera might appear bright and well exposed, even if it is not. Conversely if you are outside in bright sunny conditions it can be very difficult to see details and colours on the screen, even if the image is exposed correctly. However, the histogram never deceives, so it is good practice to always check it to assess exposure.

A well-exposed image of a mid-toned subject produces a histogram like this
A histogram is a graph that accurately shows you all the tonal ranges recorded in an image. The left hand edge corresponds to pure black (deep shadows), the right hand edge is pure white (highlights) and everything in between corresponds to all the other tonal values (mid-tones). The height reached at any point on the graph correlates to the quantity (number of pixels) of that tone in the image. The histogram shown here indicates that the image contains a small amount of pure black and deep shadow areas (left hand side), a slight larger amount of pale and highlight areas (right hand side), while the vast majority of the image falls in the mid-tone ranges (middle). Photos of most mid-toned subjects in regular light will produce histograms that look similar to this.
 If an image is over-exposed (more light than necessary), then the histogram for the same subject would be shunted significantly to the right hand side (top) and if it is under-exposed (too little light) then the histogram is weighted heavily to the left (bottom). Hence in a ‘correctly’ exposed image most of the histogram lies in the middle (centre).
I stress that these examples are for subjects that largely fall within the mid-tones, which as I have said constitute the majority of subjects in the natural world. However, if you are taking a photo of a polar bear in a snow storm, you would NOT expect the histogram of a correctly exposed image to sit largely in the middle, instead it should be heavily weighted towards the right hand side as virtually all of the image would be white or near white. Conversely, a black bear sitting in the dark recesses of a forest should produce a histogram where the left hand side dominates, as the elements of the picture are primarily dark or black.

An Arctic Tern on ice. You would expect the histogram for this image to be heavily shunted to the right hand side as it is dominated by white or near-white tones
When Not to Shoot

After 9.00am the light is horrid. Time to put down the camera and just enjoy watching
I always think the mark of a good photographer is, knowing when not to take pictures. You could adopt the ‘machine gun’ approach and take thousands of frames, in all conditions and situations, in the hope some will hit the mark (but you then have to look at them all to identify the good ones), alternatively you could pick and choose your moments carefully and only take photos when conditions and situations were conducive. I know which approach leads to better photos!
Most safaris will present a plethora of opportunities, and there is a real danger of getting a bit too ‘trigger happy’ if you are not careful. So it pays to take a deep breath, remain calm and consider what you are doing and what you are hoping to achieve each time you look through the viewfinder.
As mentioned in earlier sections, the best times of the day are early morning and late afternoon and the middle of the day is often a ‘quiet’ period photographically. Bare this in mind – in the middle part of the day is the photo you are considering really worth it? Unless you are witnessing something very unusual, it probably is not.
Composition
Engage with Your Subject

These Lion cubs were playing on a raised area. I was shooting from the lowest point I could in the vehicle and was able to get down to 'their' level
When taking photos of animals, the eyes are generally the most important feature. If 99% of a photo is sharp, but the eyes are the 1% that are out of focus, then chances are, the picture will end up in the bin. However, if the eyes are in focus, everything else can be out of focus and it will still work as a photo. For this reason, I always try to use an animal’s eyes as the point of focus or if the animal is more distant, its head.
In addition, if you can time your picture taking to coincide when the eye contains a catch-light it makes all the difference. Eyes without catch-lights look ‘lifeless’ and ‘dead’, but the inclusion of a catch-light can suddenly elevate a photo. All it takes is waiting for that right moment when the subject lifts or turns its head and the glint in the eye appears or becomes visible. Then you press the shutter.

Get down low to 'engage' with your subject: King Penguins in South Georgia
Positioning yourself appropriately can make all the difference too. When we engage with, and talk to a friend, we look them in the eye. Similarly, to properly engage with a subject it is so much better if you are able to view them from their eye level. You then have a chance of connecting with them as if you were the same species. So if it is possible to get down to eye-level with your subject, so much the better as it makes for more intimate photographs. Never is this more the case than when you are looking down barrel of a lens into the receiving glare of a lion or leopard!
Of course the practicalities of achieving this can be challenging, but it is always worth bearing in mind. When you are in a safari vehicle consider taking photos through the window seat at a lower angle, rather than through the open roof, which is higher. If you are photographing giraffes this naturally does not apply.

Face-to-face encounters are exhilerating
Remember this too when you are out of the vehicle. Do not be afraid to get down low (even lie on the ground). Not only will this help engage the subject from a natural perspective, it will also allow you to control and diffuse both foreground and background, further isolating the subject. This works particularly well when shooting through long grass.
Where possible, I always try and avoid obtrusive bodies or out-of-focus blobs (especially highlights) in the background. A clean out-of-focus background (bokeh) isolates the subject and concentrates the viewers' attention. It is all too easy when caught up in the excitement and heat of the moment to concentrate totally upon the subject and forget the background. It takes practice to train yourself to pay equal attention to both.
Many images I am asked to comment upon are let down by messy distracting backgrounds. Had the photographer simply moved or better considered their position, dramatic improvements in the final image would have resulted. It also pays to keep an eye out for twigs or the intrusions, including random parts of other animals appearing at the edge of the frame or cutting across the lines of the main subject. Also if animals are herded or grouped together wait for appropriate separation between individuals so the subjects do not appear ‘clumped’ together. This is especially important when taking portraits.
Rule of Thirds

These giant sand dunes in Sossusvlei lend themselves perfectly to a one third, two thirds composition
Composition – the framing and placement of subjects – is naturally subjective. It is like art, sometimes you love it, and sometimes you hate it. Nonetheless, there are some tried and trusted guidelines worth paying attention too, as following them leads to more pleasing images, more often than not.
The ‘rule of thirds’ is well known as a guide to composition and it is always a good starting point. Imagine dividing your frame into thirds, both vertically and horizontally, like a noughts-and-crosses grid (tic-tac-toe if you are from the other side of the Pond). On some digital cameras there is an option to make a grid visible inside the viewfinder. Each of the main grid lines falls along strong placement axis in the picture and the four points where these lines intersect are each very strong positions to consider placing a main subject.
For example horizons very rarely look good when placed along the central horizontal axis, but instead are better if placed roughly one third up from the bottom or one third down from the top. Which depends on where the emphasis of the photo is intended to be. If the land portion of the frame holds the major interest then approximately two-thirds of the picture should contain land and only one-third sky. If you are photographing a dramatic cloudscape then the horizon should be one-third (or even one quarter) up from the bottom, allowing the sky and clouds to dominate. In all instances try to make sure the horizon is horizontal (assuming it is in reality), this is especially true if the horizon includes water.

This Lioness in tree in the Serengeti is positioned where vertical and horizontal dividing lines intersect
Where a photo involves say an animal subject in the context of its environment, then the four intersect points on the grid are the obvious placement points. If the animal is facing left, it should be on the right of the frame ‘looking into’ the picture. This principle also holds true if you are composing tight portraits too. The major elements of the photo – say the eyes – should be along a line or at an intersection – but do not forget to allow space for the subject to ‘breathe’ in the frame.
I am definitely not suggesting all your photos should be composed in this way. There are always exceptions to rules and they are meant to be broken from time to time. Otherwise things would get very boring. However, the rule of thirds has stood the test of time for good reason – it works. So it is always a good place to start.
Focusing
My Nikon cameras are permanently set in Continuous-AF mode or AI Servo if you are a Canon user. Telephoto lenses when used at close range limit your depth of field (DOF) and this become more acute the longer the focal length becomes, such that at 10m or less a 400-600mm lens at apertures of f/8 or wider produces a depth of field that is measured in millimetres (the flip side of course is that such situations produce a beautiful bokeh or soft out-of-focus background).

A male Jaguar in the Pantanal. The autofocus systems of top cameras are amazingly good at tracking moving subjects. It still pays to try and keep the principle focus point on the head though
If say you are taking the portrait of a big cat you will try to make sure the focus point is on the eyes, but if the cat moves even slightly the eyes will not longer remain in focus as the DOF is so narrow. If you are in Continuous-AF mode the lens should be able to focus track and keep the eyes sharp. This principle holds true for all moving subject and one of the major advances in modern camera technology has been their ability to ‘follow focus’ or track moving subjects. Inevitably, the more expensive camera bodies tend to be better, but none of them are fail-safe.
I am also careful in my selection of focus point and always try to have the single focus point over the subject's eyes/head (see –Engage with Your Subject). Although all DSLRs have multiple focus points and allow a single focus point to be moved around the frame, remember that the central focus point is where autofocus operates at its optimum i.e. its fastest and most accurate. Once the focus point moves out towards the periphery of the frame its performance may begin to dip.
When subjects are static or slow moving, I get around this by placing the focus point in the centre of the frame, half depress the shutter to focus, then press and hold down the AF-lock, very quickly recompose the shot so the subject is not central and take the image. This can be especially useful in low light or when there is little contrast and peripheral focus points are particular susceptible to under-performing.

Birds in flight like these Atlantic Puffins provide a stern test for any photographer and autofocus system